
Facts last verified .
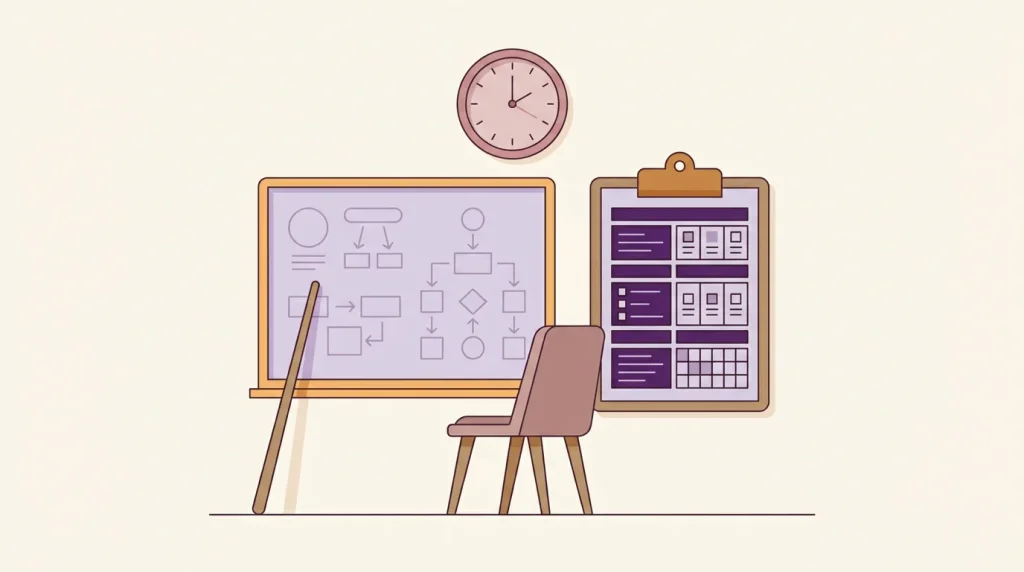
flowchart LR
    S1[Step 1
Demonstration
Show at normal speed] --> S2[Step 2
Deconstruction
Show with narration]
    S2 --> S3[Step 3
Comprehension
Learner narrates, you do]
    S3 --> S4[Step 4
Performance
Learner does and narrates]
TL;DR
The FRCEM OSCE teaching station (SLO9: Supervise & Teach) is an 8-minute scenario where you teach a junior colleague or patient a skill, procedure, examination or interpretation. Most marks are awarded for how you teach, not for encyclopaedic content knowledge. The safest framework to memorise and run on autopilot is a six-step structure derived from Peyton’s 4-step model adapted for emergency medicine: Introduce → Set objectives → Chunk and teach → Engage and check understanding → Give feedback → Summarise and signpost. Aim to spend roughly 1 minute on intro and learning needs, 4-5 minutes on the actual teaching with active checking, 1-2 minutes on feedback and learner-led repetition, and the final 30-60 seconds on summary and resources. Read the pie chart before you start so you weight your minutes correctly. Practise three or four templates aloud until your opening and closing are automatic, then plug the content in.
What is the FRCEM OSCE teaching station actually testing?
SLO9 in the 2021 RCEM curriculum is “Supervise and Teach”. The teaching station sits at position 6 in the standard FRCEM OSCE blueprint (16 stations, 8 minutes each, 1 minute reading time between). It assesses your ability to function as a senior decision-maker who can grow other clinicians, not your ability to deliver a perfect didactic lecture. The examiner is marking against domains shown on the pie chart on your station sheet: typically a mix of teaching technique / structure, communication and rapport, content accuracy, and sometimes safety and consent when a patient is involved.
For more on this, see our guide to history-taking station framework.
This station is one of the things that genuinely distinguishes FRCEM Final from MRCEM. MRCEM has a teaching-flavoured station too (SLO9 also appears in MRCEM), but in FRCEM you are expected to teach at the level of a registrar supervising an SHO or F2 — meaning you need to model how an EPIC (Emergency Physician in Charge) would behave: setting the educational tone of the shop floor, not just demonstrating a skill.
How is the 8 minutes structured in practice?
The clock is brutal. You get 1 minute of reading time outside the station to look at the candidate brief and pie chart, then the bell rings and you have eight minutes from entering the room. There is no visible countdown timer — only an analogue wall clock. Most candidates who fail this station fail on timing, not content. A workable internal split:
- 0:00 – 1:00 Introduction, name and grade check, prior experience, agree learning objectives.
- 1:00 – 5:30 Chunked teaching with frequent comprehension checks (“So before I move on, talk me through why we…”).
- 5:30 – 7:00 Learner does it (or talks it through), you give targeted feedback.
- 7:00 – 8:00 Summarise, signpost resources, agree a follow-up.
If the scenario is interpretation-heavy (an ECG, a CT head, a gas) the middle section compresses. If it is procedural (LP, chest drain, joint aspiration) the learner-led repetition can be partly verbal — explicitly say to the examiner “I would now ask Dr X to perform the procedure with me supporting them” if there is no manikin.
Which teaching framework should I actually use?
You don’t need to namedrop frameworks at the examiner, but having one running in your head stops you freezing. The three most useful for an 8-minute window are Peyton’s 4-step, SNAPPS (for case-based teaching), and a generic BST (Briefing-Skill-Teaching) opening-middle-close structure. Choose based on the scenario.
Framework comparison
| Framework | Best for | Steps | Time-fit for 8-min station | Watch-out |
|---|---|---|---|---|
| Peyton’s 4-step (Walker & Peyton 1998) | Procedural skills (LP, chest drain, joint aspiration, fascia iliaca block, otoscopy) | 1. Demonstration (silent, normal pace) 2. Deconstruction (talk through sub-steps) 3. Comprehension (learner talks teacher through it) 4. Performance (learner does it solo) | Tight. Steps 1 and 2 can be merged in 8 mins; step 4 is often verbal in OSCE. | Step 1 in silence feels weird under exam pressure — practise saying “I’ll show you once at normal speed, then break it down”. |
| SNAPPS (Wolpaw 2003) | Case-based teaching, interpretation stations (ECG, CXR, blood gas), differential reasoning | Summarise, Narrow differential, Analyse, Probe (learner asks), Plan, Select (a learning issue) | Good — learner-led so it eats less of your minutes once trained. | Designed for an already-prepared learner. In an OSCE the actor may not drive it; you may have to scaffold every step. |
| BST / Set-Dialogue-Closure (generic) | Any scenario, especially patient education (inhaler, EpiPen, peak flow) | Set (rapport + objectives), Dialogue (chunk-and-check), Closure (summary + next steps) | Excellent — the most forgiving structure for time pressure. | Can feel generic if you don’t add a learner-led element. |
| One-Minute Preceptor (Neher 1992) | Quick teaching off a case presentation; useful as a sub-framework inside SNAPPS | Get commitment, Probe reasoning, Teach a general rule, Reinforce what’s right, Correct mistakes | Sub-component only — not a full station scaffold. | Don’t use as your only structure; use within a larger frame. |
The pragmatic answer: learn Peyton’s for procedures, BST for everything else, and use SNAPPS-style “what’s your differential” prompts within either. That’s enough framework hygiene to score well on the structure domain.
For more on this, see our guide to common OSCE station fails.
What does a worked example look like?
Scenario: “You are the registrar in resus. An F2 has been allocated to perform an ultrasound-guided fascia iliaca block on a patient with a fractured neck of femur. They have observed two but never performed one. You have 8 minutes to teach them. The patient is consented and stable.”
0:00 – 0:45 Introduction & needs
“Hi, I’m Dr White, one of the registrars here today — pleased to meet you. Can I just check your name and grade?” [F2, Dr Patel.] “Great. The plan is for you to do a fascia iliaca block for the patient in bay 3. Before we start, can you tell me what you’ve already seen and what specifically you’d like to focus on today?” [Pause, listen.] “Perfect — so we’ll concentrate on probe positioning, the landmarks, and the two-pop technique, and I’ll talk you through the safety checks as we go. Stop me at any point with questions.”
0:45 – 1:15 Safety and prep (Stop Before You Block check)
“Before any regional block I run a Stop-Before-You-Block: correct patient, correct side, correct block, allergies, anticoagulants, and consent. I’ve already done that with Mrs Jones — can you tell me why each of those matters?” [Quick check.] “And the safe maximum dose of levobupivacaine here in a 60kg patient?” [Expect 2 mg/kg = 120 mg.]
1:15 – 4:30 Demonstration with deconstruction (Peyton steps 1–2 merged)
“I’ll show you the technique once at normal pace, then break it down. [Mimes once.] Now I’ll talk you through each step. Probe: high-frequency linear, depth around 4cm, marker lateral. Place 1cm distal to the inguinal ligament — you’re looking for the bow-tie of sartorius lateral and the hourglass of the femoral artery medial. The fascia iliaca is the bright line above iliacus muscle. In-plane needle approach from lateral to medial. You’ll feel two pops — fascia lata, then fascia iliaca. Always aspirate before injecting and hydrodissect with 2 mL of saline to confirm position before delivering local.”
4:30 – 6:30 Learner verbalises / performs (Peyton step 3, and step 4 if possible)
“Now talk me through what you would do, step by step, as if I were the operator.” [Listen, gently correct.] “Good — one thing to add: you mentioned aspirating, which is correct, but say it out loud to whoever’s helping you so they can see it’s negative before you push.”
6:30 – 7:30 Feedback
“Really nice structure — your Stop-Before-You-Block was thorough and your landmark description was clear. Two things to refine: first, always state the LA dose out loud before drawing it up; second, hold the probe still while injecting and watch for the spread — if you don’t see anterocephalad spread, stop and reposition. Want to mention any concerns before we close?”
7:30 – 8:00 Summary & signpost
“To summarise: pre-block safety, landmarks, two-pop technique, aspirate, hydrodissect, then inject in 5 mL aliquots. There’s a good RCEMLearning module on FIB and the AAGBI regional anaesthesia guidelines — have a look before your next shift. Let’s debrief after you’ve done the next one.”
That’s an 8-minute station that hits structure, content, learner engagement, safety, feedback, and signposting. Notice how few minutes are spent on raw content — most of it is scaffolding.
What are the most common scenarios I should rehearse?
The College draws from a recognisable pool. Based on candidate reports and the FRCEM revision corpus, prepare templated approaches for:
- Procedures: lumbar puncture, chest drain, fascia iliaca / femoral nerve block, joint aspiration (knee, shoulder), reduction of a Colles’ or shoulder dislocation, suturing, intercostal drain insertion, cricothyroidotomy (verbal only).
- Examinations: cranial nerves, GALS, focused cardiac/respiratory exam, neurological lower limb, paediatric head-to-toe, ophthalmoscopy, otoscopy.
- Interpretation: 12-lead ECG (STEMI mimics, bradyarrhythmias, tachyarrhythmias), CT head (bleed types), CXR (pneumothorax, lobar collapse), arterial blood gas, CSF analysis, paediatric ECG.
- Patient education: inhaler/spacer technique, EpiPen, peak flow, glucometer, post-concussion advice, head injury safety-netting.
- Safety / system teaching: handwashing, donning and doffing PPE, sharps safety, sepsis recognition for a new junior.
Build a one-page crib for each of the top ten and rehearse the opening and closing aloud — those minutes earn you marks regardless of the topic.
How do I avoid the classic FRCEM teaching station fails?
Recurring failure modes from candidate debriefs and examiner feedback:
- Lecturing. Eight minutes of monologue scores poorly even if your content is flawless. Check understanding every 60-90 seconds.
- No learning objectives. If you don’t agree what you’re teaching in the first minute, the examiner can’t score you on objective-setting.
- Skipping the learner-does-it phase. Even if there’s no manikin, verbalise it: “I’d now have Dr X perform the next attempt while I supervise.”
- Forgetting consent and patient safety. If the scenario involves a patient, name-check consent and dignity to the examiner — easy domain marks.
- Running out of time. No summary, no signposting, no follow-up plan. Set a mental cut-off at the 6:30 mark and move to feedback whether you’ve covered everything or not.
- Wrong weighting. If the pie chart says 50% communication and 30% structure, do not spend five minutes on content minutiae. Read the chart, then plan.
- Talking down. Calibrate to the learner’s grade. An F2 doing their first chest drain needs different teaching from a CT3 refining their technique.
What do candidates say about it on Reddit and in debriefs?
Across r/doctorsUK and FRCEM candidate forums the most consistent themes are:
- “The teaching station is one of the more pass-able stations if you have a template — and one of the easiest to flunk if you wing it.”
- “Practise out loud with a partner playing the F2. Reading the templates silently doesn’t work. The first time I said the opening aloud I was 20 seconds over.”
- “Treat the examiner as invisible until they speak. Talk to the learner the whole time.”
- “Get someone to set you a topic you don’t know well and practise teaching it. The framework carries you even when content is shaky.”
- “Don’t forget to use the reading minute. Decide your structure before you walk in — Peyton’s vs BST — then commit.”
How does this differ from the MRCEM teaching station?
Both exams test SLO9. The MRCEM OSCE teaching station typically pitches the learner as a medical student or very junior trainee learning a basic skill, and the content can be more procedural. The FRCEM teaching station expects you to behave like a registrar — calibrating to a more experienced trainee, scaffolding clinical reasoning (not just hand skills), and occasionally weaving in supervision elements (giving feedback on a near-miss, debriefing after a difficult case). The structural framework is identical; the seniority of your voice should differ.
FAQ
How many teaching stations are in the FRCEM OSCE?
One dedicated SLO9 station out of 16. Procedural and examination stations can also include a teaching element, but only one is explicitly the “Supervise and Teach” scenario.
Can I use a written aide-mémoire in the station?
No — you cannot bring notes in. You can use the candidate brief and pie chart in the room and read them again during the station if you need to re-orient. An analogue clock is on the wall.
Do I need to name-drop the teaching framework to the examiner?
No, and most candidates who try this sound forced. The examiner is marking the behaviours, not the label. Use the framework silently to scaffold your minutes.
What if I don’t know the topic well?
You’ll still pass if your structure is solid. State your learning objectives narrowly (“Today we’ll cover landmarks and the two-pop technique”), be honest about scope (“CSF analysis beyond opening pressure is outside what we’ll cover today — I’ll signpost a resource”), and lean on chunking and learner engagement.
How much of the mark is content vs technique?
It varies by scenario but the pie chart usually gives roughly 60-70% to teaching technique, communication, and structure, and 30-40% to clinical content accuracy. Read the chart before you start — it tells you exactly how to spend your minutes.
Should I write learning objectives on a whiteboard if one is provided?
If a whiteboard or paper is on the desk, use it — writing the two or three objectives down at the start scores easy marks for structure and gives you a closing summary anchor.
What if the actor playing the learner is passive or unhelpful?
Expect this. Use open invitations (“What do you already know about this?”), give a pause of 2-3 seconds, and if nothing comes back, scaffold for them (“OK, let me start with the basics and we’ll build from there”). Don’t get rattled — the examiner is watching how you adapt.
Can I be asked to teach a patient rather than a colleague?
Yes. Common patient-teaching scenarios are inhaler/spacer technique, EpiPen administration, peak flow recording, and post-concussion or head-injury safety-netting. The same scaffold applies — replace clinical jargon with plain English and use teach-back (“Can you show me how you’d use this at home?”).
How long should the introduction take?
No more than 60-75 seconds. Anything longer and you’ll eat into teaching time. A tight opening: name, grade check, agree topic, agree objectives, set the contract (“I’ll show you, then talk through it, then you have a go”).
Is Peyton’s 4-step really feasible in 8 minutes?
Yes — but merge steps 1 and 2 (the silent demo and the talk-through) into a single deliberate demonstration with commentary. Use the saved time for the comprehension step, which is where most learning happens.
What should I do in the last 30 seconds if I’ve finished early?
Summarise the learning objectives ticked off, ask if there are any remaining questions, signpost a specific resource (RCEMLearning module, BMJ Best Practice topic, a specific guideline), and agree a follow-up (“Let’s debrief after your first supervised attempt”). Don’t sit in silence.
Where can I get realistic practice?
Pair up with a fellow candidate, swap roles, and time each other on a topic you haven’t prepared. Use the St Emlyn’s FRCEM revision guide (Chapter 10 — teaching stations) and EM Skills Academy templates as a starting point, but the marginal gain is in spoken repetition, not silent reading.
Next step
Drill three opening templates and three closing templates until they’re automatic, then practise four full 8-minute scenarios per week with a partner from the topic list above. For a structured FRCEM Final OSCE programme with examiner-style feedback, see emfinalexams.com.
Facts last verified .
Ready to build your plan? EMF Premium gives you all 40,000+ questions, 20 mocks and 1,215 OSCE stations from £29/month — or a one-off 3- or 6-month pass.