
Last verified: 30 May 2026. Eight minutes. One joint. One slightly tired actor pretending their shoulder hurts. The MRCEM OSCE MSK station is where candidates either look like an ED registrar or a flustered medical student, and the difference is almost always structure rather than knowledge.
TL;DR – the MSK station in 30 seconds
- Format: 1 of 16 stations, 8 minutes, 1 minute reading time. Blueprinted as a “Complex stable patient” (SLO1) or “Injured patient” (SLO4) station.
- Structure that scores: LOOK – FEEL – MOVE (active, passive, resisted) – SPECIAL TESTS – NEUROVASCULAR – FUNCTION.
- Most-tested joints: shoulder, knee, hand/wrist. Ankle and lumbar spine appear regularly. Hip and elbow are less common but still on the blueprint.
- Where candidates lose marks: skipping gait, forgetting the joint above/below, missing the neurovascular check, and running out of time before special tests.
flowchart LR
    A[Introduce + consent
Expose adequately] --> B[Look
Scars, swelling, deformity]
    B --> C[Feel
Temperature, tenderness]
    C --> D[Move
Active, then passive]
    D --> E[Special tests
Joint above and below]
What exactly is the MSK station in the MRCEM OSCE?
The MRCEM OSCE has 16 stations of 8 minutes each, with 1 minute of reading time between stations and a borderline regression pass mark. The musculoskeletal station can appear in two flavours on the RCEM blueprint: as a Complex stable patient (SLO1) where a relatively well patient walks in with joint pain, or as an Injured patient (SLO4) where you assess a limb after trauma. Either way, the examiner is watching one thing above all else: do you have a safe, reproducible structure that you can apply to any joint?
For more on this, see our guide to OSCE system examination station structure.
You will not be asked to make a definitive orthopaedic diagnosis. You are being assessed as an ED clinician: rule out limb-threatening pathology, decide on imaging, decide on disposition, and communicate clearly. Structure plus safety plus communication is what passes this station.
What’s the universal structure I should use for every joint?
If you remember nothing else from this article, remember this scaffold. It works for every joint, paediatric or adult, and it is exactly what RCEM examiners are trained to mark against.
- Introduce, consent, expose. Name, role, hand wash, PPE, chaperone offered, analgesia offered, appropriate exposure with dignity preserved.
- Brief focused history. Mechanism, hand dominance, occupation/hobbies, tetanus status if there is a wound, red flags relevant to the joint.
- Gait (where relevant – always for lower limb and spine).
- LOOK – inspect front, back, sides. Both sides. Scars, swelling, deformity, erythema, wasting, posture.
- FEEL – temperature, effusion, bony landmarks, tendon insertions, pulses.
- MOVE – active first, then passive, then resisted. Always compare both sides.
- SPECIAL TESTS – pathology-specific (e.g. Hawkins for impingement, McMurray’s for meniscus, Simmonds’ for Achilles).
- NEUROVASCULAR ASSESSMENT – sensation, motor, distal pulses, capillary refill.
- FUNCTION – can the patient grip, walk, use the joint for daily life?
- Close – thank, offer to help dress, summarise findings to the examiner, state differential, plan investigations and disposition, offer to examine the joint above and below.
Candidates who run out of time almost universally do so because they over-talked the introduction or got lost in palpation. Move briskly through LOOK and FEEL so that you have time for the special tests and neurovascular check – those are where the differentiating marks live.
What does each joint actually look like in 8 minutes?
The tables below summarise the high-yield content for each commonly tested joint. Treat them as a checklist you can rehearse out loud with a colleague until the structure becomes automatic.
For more on this, see our guide to OSCE history-taking framework.
Shoulder examination
| Step | Key actions |
|---|---|
| Look | Front, back, sides, axilla. Wasting of deltoid/supra-/infraspinatus, scars, asymmetry, winging of scapula. |
| Feel | Anterior: SCJ → clavicle → ACJ → coracoid → biceps tendon → greater tuberosity. Posterior: acromion → spine of scapula → paraspinal muscles. |
| Move | Flexion, extension, abduction, adduction, internal and external rotation. Stabilise scapula from behind. Active, passive, resisted. |
| Special tests | Empty can (supraspinatus), drop arm test (full thickness tear), Gerber’s lift-off (subscapularis), resisted external rotation (infraspinatus), Hawkins/Neer’s (impingement), sulcus and apprehension (instability). |
| Neurovascular | Regimental badge sensation (axillary nerve), radial pulse, distal sensation/motor. |
| Complete | Examine joint above (neck) and below (elbow). Consider AP and axillary or scapular Y X-ray if trauma. |
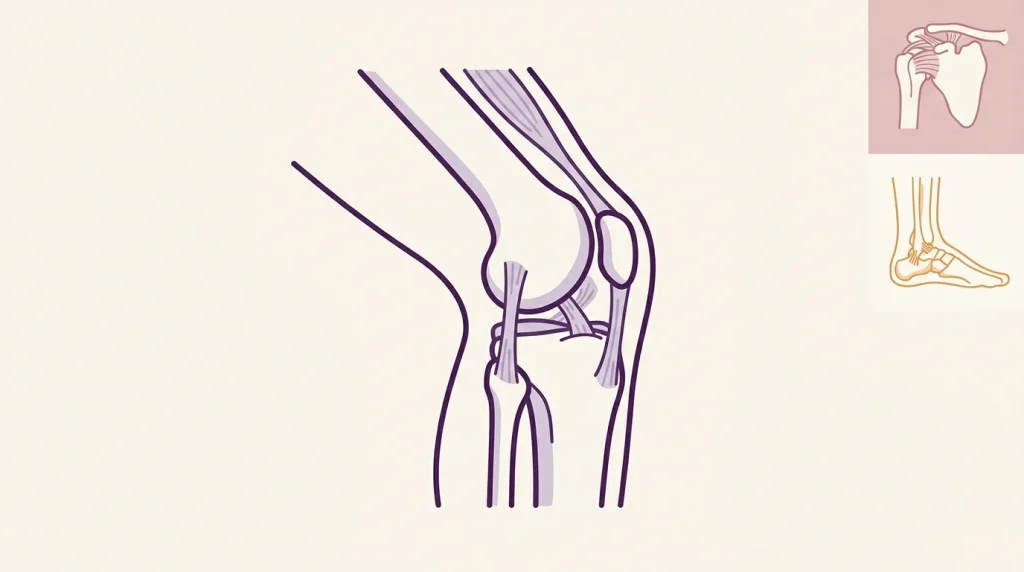
Knee examination
| Step | Key actions |
|---|---|
| Gait | Antalgic, varus/valgus thrust, locked knee, refusal to weight-bear. |
| Look | Quadriceps bulk, varus/valgus alignment, popliteal swelling (Baker’s), scars, effusion. |
| Feel | Warmth (back of hand, compare sides), patella tap and sweep test for effusion, joint line tenderness, patellar borders, tibial tuberosity, fibular head, popliteal fossa. |
| Move | Flexion and extension active/passive/resisted. Hand over patella feeling for crepitus. |
| Special tests | Straight leg raise (extensor mechanism), anterior and posterior drawer, Lachman’s (ACL), valgus and varus stress at 0° and 30° (MCL/LCL), McMurray’s (meniscus), patellar apprehension. |
| Neurovascular | Dorsalis pedis and posterior tibial pulses, common peroneal nerve sensation (dorsum of foot), motor (foot dorsiflexion). |
| Complete | Examine hip and ankle. Apply Ottawa knee rules to decide on imaging. |
Ankle and foot examination
| Step | Key actions |
|---|---|
| Gait | Antalgic, foot drop, heel and toe walking if able. |
| Look | Standing arch (pes planus/cavus), toe deformities, sole (Lisfranc bruising), between toes. |
| Feel | Bones (malleoli, base of 5th metatarsal, navicular, calcaneus), ligaments (ATFL, deltoid), syndesmotic squeeze, posterior tibial and dorsalis pedis pulses. |
| Move | Dorsiflexion, plantarflexion, inversion, eversion – active, passive, resisted. Cup the heel for passive. |
| Special tests | Simmonds’/Thompson’s test (Achilles rupture), anterior drawer (ATFL), squeeze test (syndesmosis), Morton’s test (interdigital neuroma). |
| Neurovascular | Sensation in all five nerve distributions of the foot, capillary refill, distal pulses. |
| Complete | Examine knee. Apply Ottawa ankle and foot rules. Document weight-bearing status. |
Hand and wrist examination
| Step | Key actions |
|---|---|
| Look | Dorsum then palm. Deformity, swelling pattern (RA: MCPJ/PIPJ; OA: DIPJ/PIPJ), wasting (thenar/hypothenar), nail changes, scars. Check elbows for rheumatoid nodules. |
| Feel | Temperature, radial pulse, all bones, joints, metacarpal squeeze, thenar/hypothenar/midpalmar spaces, tendon sheaths. Allen’s test if asked. |
| Move | Wrist: flex, extend, radial/ulnar deviation, supination/pronation. Fingers: extensor tendons (MCPJ extension, isolated DIPJ extension), flexor tendons (FDS – hold other fingers, flex; FDP – isolate PIPJ, flex tip). Thumb: flex, extend, oppose, abduct, adduct, UCL stress. |
| Special tests | Finkelstein’s (De Quervain’s), Phalen’s and Tinel’s (median nerve), Froment’s sign (ulnar nerve), OK sign (AIN). |
| Neurovascular | Radial, median, ulnar sensation and motor. Capillary refill, radial pulse. |
| Complete | Examine elbow and shoulder. Functional grip, pinch, hook. |
Lumbar spine examination
| Step | Key actions |
|---|---|
| History red flags | Age <20 or >55, thoracic pain, night pain, weight loss, history of cancer, immunosuppression, IV drug use, trauma, bladder/bowel disturbance, saddle anaesthesia, bilateral leg symptoms. |
| Look | Standing, from side and behind. Lordosis, kyphosis, scoliosis, scars, muscle bulk, natal cleft asymmetry. |
| Feel | Palpate each spinous process, paraspinal muscles, sacroiliac joints. Comment on warmth, step deformity, tenderness. |
| Move | Flexion, extension, lateral flexion, rotation. Schober’s test for fixed lumbar flexion. |
| Special tests | Straight leg raise (sciatic), crossed SLR (large central disc), femoral stretch test, FABER (SI joint vs hip), Bowstring sign. |
| Neurovascular | Power L2–S1, sensation in dermatomes, reflexes (knee, ankle, plantars). Offer PR for tone and perianal sensation if cauda equina suspected. |
| Complete | Examine hip joints, abdomen, and offer cauda equina screen. Imaging per NICE/local guidance. |
What are the most common MSK station pitfalls?
From candidate debriefs on r/doctorsUK, Facebook MRCEM groups, and consultant examiner blogs, the same handful of errors recur every diet.
- Talking too much in the introduction. Examiners want concise consent and a chaperone offer, not a soliloquy. Aim for under 45 seconds.
- Forgetting gait. If the joint is lower limb or spine, you must comment on gait – even saying “I would observe the patient walking” if the actor can’t.
- Examining only the affected side. Compare both. Always. State you would do so even when the actor only exposes one side.
- Skipping the neurovascular exam. Almost guaranteed to lose you marks, especially in trauma stations.
- Missing the joint above and below. Examiners listen for this in your closing summary.
- Choosing the wrong special test. If the actor says “my shoulder pops out”, do apprehension and sulcus – not impingement tests.
- Not addressing pain. Offer analgesia at the start and check throughout. Causing the actor to wince repeatedly is a fail flag.
- No closing plan. Examiners want to hear differential, investigations, disposition, safety net.
How should I structure the 1-minute reading time?
You will get a one-line stem outside the door. Use the minute to:
- Identify the joint and likely pathology category (trauma vs atraumatic vs systemic).
- Pre-load the 3 most likely differentials so you can name them in your closing summary.
- Choose 2–3 special tests you will definitely do.
- Decide what imaging rule applies (Ottawa knee, Ottawa ankle, Canadian C-spine, NEXUS, NICE back pain).
Walk in with a plan and the structure runs itself.
How do I close the station so the examiner gives me the marks?
A clean close is worth one or two marks that often decide borderline cases. Aim for around 60 seconds at the end:
- Thank the patient, offer to help them dress, restore dignity.
- Turn to the examiner: “To summarise, on examination of Mr X’s right knee I found…”
- Give a one-line differential: “My leading differential is an ACL rupture with possible meniscal injury.”
- Plan: “I would like to apply the Ottawa knee rules, obtain AP and lateral X-rays, provide analgesia, refer to orthopaedics, and consider outpatient MRI.”
- Safety net: “I would discuss weight-bearing status, crutches, and red flag advice on discharge if appropriate.”
How should I practise in the weeks before the exam?
Reddit and Facebook candidate groups consistently flag the same prep pattern as effective:
- Pair up. Practise every joint out loud against a timer with a colleague playing patient and examiner. Solo silent revision does not work for OSCE.
- Eight minutes, every time. Train the time pressure. Most candidates can do a knee exam in 12 minutes; the discriminator is doing it in 6 with a clean close.
- Record yourself. Cringe-inducing but the fastest way to spot the verbal tics and dead air.
- Watch the Geeky Medics MSK playlist. The cadence, exposure habits, and special test technique are exactly what RCEM examiners expect.
- Do a course in the last fortnight. Mock circuits with feedback uncover blind spots no amount of book study will.
- Don’t neglect paediatric MSK. Limping child, NAI screen, pGALS, septic vs transient synovitis (Kocher criteria) – these regularly appear as the paediatric MSK overlap.
FAQ
How many MSK stations are there in the MRCEM OSCE?
Usually one, occasionally two, out of 16 stations. MSK can appear under SLO1 (complex stable patient) or SLO4 (injured patient). You should also expect MSK content to creep into procedural (SLO6), teaching (SLO9), and paediatric (SLO5) stations.
Which joint is most commonly examined?
Shoulder, knee, and hand/wrist appear most often in candidate recall posts. Ankle and lumbar spine are next most frequent. Hip and elbow are less common but fully on-blueprint.
Do I have to do every special test on every joint?
No. Pick 2–3 tests targeted at your top differential. Mentioning that further tests “would be appropriate if I had more time” is acceptable and shows breadth.
What if the actor refuses to do a movement because of pain?
That is the test. Acknowledge the pain, offer analgesia, attempt passive movement gently, and document the limitation. Pushing through is a flag for poor patient care.
Will I be marked down for not knowing every anatomical landmark by name?
You’ll be marked down for fumbling. Know the major bony landmarks of each joint cold; the examiner is checking systematic palpation rather than reciting a textbook.
Should I always offer a chaperone?
Yes. Every examination station. Document it in your verbal narrative even if the actor declines.
Is the MSK station harder for IMG candidates?
Examiners report that IMGs sometimes struggle with the script-and-narrate style of UK OSCE, not the underlying clinical content. Practise verbalising each step (“I am now palpating the joint line, looking for tenderness…”) until it feels natural.
What happens if I run out of time?
The examiner will stop you. You can still earn closing marks by quickly summarising what you would have done next – “I would now perform special tests, neurovascular assessment, and examine the joint above and below”.
Can I ask the examiner questions?
You can clarify the task at the start (“Would you like me to examine both sides? That would be my normal practice”) and may be invited to answer questions at the end. Don’t turn it into a viva – keep momentum.
How is the MSK station scored?
The whole OSCE is standard set by borderline regression. Each station is marked against a structured mark sheet with domain scores (clinical examination, communication, professionalism, plan). One station alone rarely fails you – a pattern of borderline performance does.
Should I always offer PR examination at the end?
Only when relevant – lumbar spine with red flags, suspected cauda equina, or perineal trauma. Routinely offering it for a wrist exam looks performative.
What’s the single best piece of advice from candidates who passed first time?
“Build the structure so deep that nerves can’t shake it.” Rehearse out loud, on a timer, until the framework runs itself – then you can spend cognitive bandwidth on the patient in front of you.
How do paediatric MSK presentations differ?
A paediatric MSK station in the MRCEM OSCE is almost always about safety-netting, not orthopaedic precision. Examiners want to see you screen for serious pathology in a calm, child-friendly way and act on it.
- The limping child is a recurring scenario. Use pGALS to screen all joints quickly, then focus on the painful joint with LOOK–FEEL–MOVE. Apply Kocher’s criteria when distinguishing septic arthritis from transient synovitis: non-weight-bearing, fever >38.5°C, ESR >40, WCC >12 × 10⁹/L. Any concerning combination warrants urgent orthopaedic review and joint aspiration.
- Non-accidental injury screening should be at the front of your mind for any pre-verbal child with an unexplained injury. Comment on injury pattern, age-appropriateness, and consistency between history and findings. Mention safeguarding referral if indicated.
- Age-specific differentials: developmental dysplasia of the hip and septic arthritis in infants; transient synovitis and Perthes in the 3–9 age group; SUFE in adolescents (always examine the hip in a child with knee pain).
- Communication with both child and parent is scored. Address the child by name, get down to their level, explain in simple terms, and check parental understanding.
How should I think about “red flags” during an MSK station?
Every MSK station has hidden red flags built into the actor’s script. Picking them up and acting on them is what separates a borderline pass from a clear one.
- Open fracture or neurovascular compromise – escalate immediately, splint, antibiotics, tetanus, orthopaedic referral.
- Cauda equina symptoms – urinary retention or incontinence, saddle anaesthesia, bilateral sciatica, reduced anal tone. Urgent MRI, urgent neurosurgical referral.
- Septic joint – hot, swollen, painful joint with reduced movement and systemic upset. Joint aspiration before antibiotics where possible.
- Compartment syndrome – pain out of proportion to injury, pain on passive stretch, paraesthesia. Loosen all bandages, urgent orthopaedic review, consider compartment pressures.
- Cervical spine injury – mechanism plus midline tenderness or neurology. Immobilise, apply Canadian C-spine or NEXUS, image accordingly.
- Malignancy red flags in back pain – age extremes, weight loss, night pain, known cancer, neurological signs. Investigate urgently.
You don’t need to find every red flag. You need to demonstrate that you actively looked for them and that you know what to do if one appears.
Facts last verified against the RCEM MRCEM OSCE Regulations and Information Pack, St Emlyn’s FRCEM Revision Guide Chapter 7, and Geeky Medics MSK OSCE library.
Next step: Build your full MRCEM OSCE revision plan with the rest of the station-by-station guides at emfinalexams.com.
Ready to build your plan? EMF Premium gives you all 40,000+ questions, 20 mocks and 1,215 OSCE stations from £29/month — or a one-off 3- or 6-month pass.